


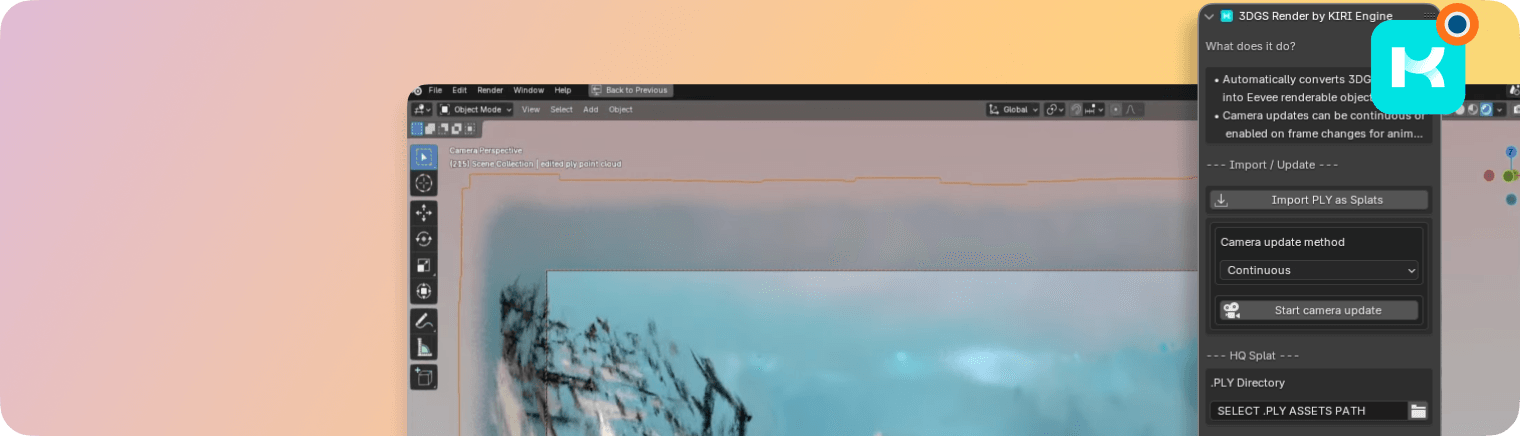
3DGS Render by KIRI Engine
The addon imports 3DGS scans and transforms them into mesh objects that can be edited, rendered and animated inside Blender. Several dedicated editing and animation modifiers are included to help improve performance and craft impressive renders.
 Joe · Jan 21, 2025
Download Point Animate Addon:
 or
or
Please note: We are making these Blender addons available to you completely for free.:) If you like what we are doing, the best way to support us is to download KIRI Engine app on your phone and consider becoming a KIRI Engine Pro user
1. What does the addon do?
This Blender addon enables the seamless import of 3DGS scans, converting them into mesh objects that you can edit, render, and animate. It also offers in-built modifiers for editing and animation; for boosting performance and creating stunning renders.
2. Important Notes
Reading the full documentation is recommended. If you do not have time right now and want to get started immediately, you should at least check these points and the Quick Guide.
- Once imported, Gaussian Splat scans are converted into a single object with thousands (often millions) of polygon faces. To accurately display the 3DGS object, these faces need to be 'updated' to face the current view/camera.
- The process of updating faces can be very performance heavy - especially if done continuously. So, any work that can be done to reduce the number of faces will improve performance.
- Whenever possible, adjusting and applying all modifiers will result in better performance and visual quality.
- Linear camera moves often do not require faces to be updated – and the 3DGS Render modifier can be applied. This will improve performance and can stop the visual 'popping' that sometimes occurs when faces are updated.
- Animating a full 3DGS scene is very heavy – it can be best to split a 3DGS scene into several objects and only animate a small, focused section.
3. Quick Guide
Preparation Stage (optional) – Use the import/edit points menu to remove as many points as possible:
- Turn a full 3DGS scene into an isolated object.
- Remove any points that will be behind the camera.
- Import a .PLY object as splats. - updates are disabled by default on importing.
- Add a camera into the scene.
- Move your 3DGS object so it is visible in the camera view.
- Enable Camera Updates for the object.
- Enable Use Active Camera for the object.
- Enable the Camera Cull modifier from the Modify - Edit menu.
- Pressing Auto Set up will match the Camera Cull modifiers settings to the active camera and scene settings.
- While looking through the camera, Camera To View (N Panel, view tab) can be enabled, this will allow you to navigate around the 3D view port with the 3DGS object and camera culling modifier updating automatically.
- If you are not moving the camera, or moving along a single axis for your renders, you can apply the 3DGS Render modifier.
For even better performance you can take advantage of the full list of modifiers and functions. They are covered in the full written documentation and documentation videos.
4. Installation
Important note:
The addon was made for Blender 4.2 – the addon will NOT work with previous versions of Blender.

To install the addon make sure you have downloaded the .ZIP file (3dgs_render_by_kiri_engine_version number).ZIP to your computer.
.-LjbFsKn.png)
In Blender – navigate to Edit…Preferences
.BHb-RtHT.png)
and from the small drop-down arrow, select Install from disk. Select the addon .ZIP and hit install.
The addon can now be found in the 3d viewport. Pressing the 'N' key will bring up the N panel where you can find the addon.
The add-on works with the Eevee render engine. If you have another render engine enabled (Cycles, Workbench) you will first be prompted to switch to Eevee.
.BjAUALGV.png)
Once Eevee is enabled you will see the full addon interface.
.BLxKn94O.png)
5. Interface Overview
The addon interface is split into three sections. We will look at each section individually in greater detail later:
Scene
Buttons and settings here will affect all enabled 3DGS objects in the scene.
.8izJl8uf.png)
Active Object
Buttons and settings here will affect only the active object, if enabled.
.BCpFFJw0.png)
Active Mode
This menu is dynamic and can be changed depending on what task you are currently trying to perform. A full workflow from .PLY to a finished render can be performed by going from top to bottom.
6. Scene Menu
For your object to appear correctly – each face of the model needs to 'look at' your current view.
.CfaYpIdO.png)
This updating can be forced for all enabled 3DGS objects in your scene by toggling Start camera update, on or off
.8jrtfdwH.png)
When this is turned on the faces of all enabled 3DGS objects in the scene are forced towards the current view/camera.
There are two modes – Continuous and Frame Change
Continuous will attempt to rotate the faces as often as possible with no delay. This can be very performance heavy.
Frame Change will rotate the faces, every time the frame changes on your timeline. This means that you can control the updates by moving frame with left/right keys.
Update all To View will update all enabled objects once to the current view.
.CaxFsuX0.png)
7. Active Object Menu
.DaOZN3oJ.png)
Updates can be controlled individually for each object.
Immediately after importing, updates for an object are set to disabled.
Object updates can be enabled, disabled, or the object can be shown As A Point Cloud
.Vq3rAXfM.png)
.DTz6MCLe.png)
When moving 3DGS objects around in the scene it is recommended to disable updates or Show As A Point Cloud to lighten performance requirements.
If Enable Camera Updates is selected two new options will be available - Update Active To View and Use Active Camera.
.CC-9P1ER.png)
Update Active To View will update only the active 3DGS object (not the whole scene) to the current view.
.qeyR7lyO.png)
Using Active Camera will automatically make the active 3DGS object continually face towards the scene's Active Camera.
.D23X587t.png)
Pressing Apply Modifiers will bring up a new menu that will show all currently applied 3DGS modifiers for the active object. Using the check boxes and 'okay' will apply all selected modifiers for the active object.
.ChHEE8is.png)
.D5Zoh56y.png)
Important note:
If you know you are not going to update a 3DGS object again (it may be a background element or used in a static camera shot) you can apply the 3DGS Render modifier. After doing this the object can no longer be updated but performance will be much better.
8. Active Mode - Import 3DGS
.C9Wk7gq2.png)
Only one button is shown, Import PLY As Splats.
.ByJdmoXj.png)
After pressing this button, you will be shown the import options.
.CPo1s0M7.png)
Auto Rotate For Blender Axes (Z UP) - Blender uses a different world axis system than many game engines or 3DGS scanning solutions. Enabling Auto Rotate will rotate the model on importing to match Blender's world axis (Z Up).
Default Face alignment (Edit Mode) - To facilitate easier editing you can specify the default alignment for faces when they are imported (and in Edit mode). They can be aligned to the X, or Z axes. Y is the default as this is 'forward' facing.
.B6WcxW_V.png)
After pressing okay to confirm your settings, a file browser will open.
You can choose a .PLY to import. Depending on the size of the 3DGS scan and your computer specs, you may need to wait for the import to be completed.
Once imported, the new object will have camera updates set to Disabled by default, this is to allow you to scale, move and rotate the object into the desired position before enabling updates.
Enter material view or rendered view to see the object correctly. Be patient while Eevee calculates shaders (it will only do this once).
Important note:
Do apply rotation or scale transformations to the 3DGS object.
Updating faces while the viewport is in orthographic mode is not possible. A warning proxy will show if faces are updated in orthographic mode.
Orthographic cameras can still be used.
9. Active Mode - Import/Edit Point Cloud
.BcnyPdZB.png)
This part of the workflow is optional but can be particularly useful for quickly removing unwanted points or isolating a single part of your 3DGS scan.
This menu will let you import a .PLY file as a point cloud, append several editing modifiers and re-export the edited .ply.
The edited .PLY file can be reimported as a 3DGS object.
.vr_LZtC_.png)
Import .PLY As Points will open a file browser to select a .PLY for importing. Once imported the .PLY will appear as a point cloud and new options will be available.
Important note:
This same warning is given when using the import button, but it is worth repeating.
Do NOT apply scale or rotation transformations to your point cloud. You may rotate, move, and scale the object to make editing more comfortable while working but any rotation and scale changes will be reset upon exporting.
.BHwFqSit.png)
Append Point Edit Modifier - The point cloud can be edited using Blenders native tools, but you may find it useful to append the Point Edit Modifier. Adding this modifier converts the object's colour attributes (so they are visible in rendered and material preview modes)
You may apply, and re-add the modifier as many times as you need.
.CbxgGRjR.png)
Add Wire Sphere / Cube - This will add a wireframe cube/sphere to the scene. This object will not render and can be used as a target for various modifiers (e.g. crop box)
.DOnSSZd-.png)
Enable Auto Crop BG Sphere - This can be used to automatically remove the sphere of background points commonly included in 3DGS scans. If the points are not immediately removed adjust the Sphere Threshold.
Enable Crop - This allows you to specify a crop object and a method of cropping. Points Inside, Outside or by distance to the crop object can be removed. If moving the crop object doesn't seem to edit points, you may need to refresh the modifier:
.C6Eh5rwh.png)
Remove Isolated Points - This can be used to remove points that have no close neighbours. The distance to a closest neighbour to be considered for deletion is set with the Distance Threshold.
Colour Edit - Points are removed according to their colour. A colour selection and a removal method can be set. Points can be removed if their colour is Equal To, Not Equal To, Darker Than or Brighter Than the selection colour.
Enable Decimate - This will remove a percentage of the total number of points from 0 - 100. The Decimate Seed will change which points are removed.
When you are happy with your edits you can re-export your object as a .PLY file using Export Points For 3DGS.
.B0kFYlMt.png)
10. Active Mode - Modify - Edit
.5fkuAbxO.png)
This modifiers on this menu all work to reduce the number of faces in a 3DGS object - increasing performance. Though they can also be used for animation purposes. It is advised to use Camera Cull at the very least for good performance.
While each modifier works to reduce performance required by the 3DGS Render modifier (which updates the faces) – some performance is required for these modifiers to take effect. So, if you have used a modifier to make an edit and will not be changing it again, it is best to apply the modifier.
Add Wire Sphere / Cube - This will add a wireframe cube/sphere to the scene. This object will not render and can be used as a target for various modifiers (e.g. crop box)
Camera Cull - This is often the most important modifier in terms of performance and usability. The modifier will remove faces outside of the camera bounds and by distance to the camera.
.BrmrjDJo.png)
.BANv626G.png)
.k4fEZYQU.png)
An active camera is required to use it – if the modifier is enabled and no active camera is present, a warning will show:
.D924m6yU.png)
The modifiers settings must match the active camera and scene settings (focal length, render resolution etc) – you can set this up quickly with Auto Set Up.
.DsquubKy.png)
The distance between the camera bounds and deleted faces is controlled with Padding. It is recommended not to set this a 0 to avoid flickers when moving the camera.
Faces can by distance to the camera using Closer Than and Further Than values.
Decimate - This will remove a percentage of the total number of faces from 0 - 100. The Decimate Seed will change which faces are removed.
.Dvs3JcuM.png)
.CTB-1IUH.png)
It can be useful to use a high number while working to improve performance, then drop this number during rendering.
Removing any number of faces is helpful – so a low number like 5% can be used, and the modifier applied to improve performance
Crop Box - This allows you to specify a crop object or collection and a method of cropping. Faces Inside, Outside or by distance to the crop object/s can be removed.
.jPBfQLSP.png)
.aOCa_gDD.png)
Colour Edit - Faces are removed according to their colour. A colour selection and a removal method can be set. Faces can be removed if their colour is Equal To, Not Equal To, Darker Than or Brighter Than the selection colour
.B7u_quvg.png)
.C6XBTgaa.png)
The colour selection can be finetuned with hue, saturation and value thresholds.
.DaD4iTrB.png)
Important note:
Due to Blender limitations – red values may be very difficult to select.
Remove Stray - This will remove faces based on their size or edge length.
.BgR6SaPv.png)
.Brb-prkX.png)
Remove Stretched Faces - Many times - especially when working with a single isolated object – floating artifacts will have the biggest or most stretched faces (relative to the rest of the object). So, by targeting faces with the largest edge length, you can sometimes remove artifacts this way.
Remove Small Faces - The smallest faces may not be artifacts but may not contribute a lot to the overall visual quality. Removing these unnecessary faces and applying the modifier can help improve performance.
11. Active Mode – Shading
.BK1yfGzs.png)
The Shading menu allows you to easily edit your 3DGS objects materials.
all 3DGS objects imported by the addon share the same KIRI_3DGS_Render_Material and changes made in the Shading menu will be global.
.BKstvUOX.png)
Toggling any of these buttons will expand the interface to expose the full colour editing options for the object's shader.
Shadeless
If shadeless is enabled – the object will not react to the scene's lights or world lighting. all colours will render 'flat' as the lighting appeared when the .PLY was scanned.

.C6RMEdev.png)
Adjust BSDF Shader
.DBD2lCX8.png)
If shadeless is disabled, BSDF settings for metallic, roughness, emission strength and Specular are shown.
Because the object is composed of single, flat faces – adjusting the BSDF shader will not give results comparable to a normal polygon mesh, but it can still be useful to fine tune the material's look.
.5iAd6hws.png)
Base Colour Adjustments
.CxeuSwxN.png)
Toggling Base Colour Adjustments, shows options for manipulating the materials brightness, contrast, hue and saturation
.dTxGm4c1.png)
White Balance
If White Balance was not set accurately during scanning, you can adjust white balance here.
.DejX8r7z.png)
White balance Temperature is set using standard Kelvins.
.B7oTXsQP.png)
.Ds9XqWTG.png)
Colour Masks
It is possible to target a specific colour within your object and replace that colour with another colour and specific blend mode.
After enabling Show Colour Masks, you can enable/disable up to three colour masks.
.ChqJs5Ck.png)
.DqHur_VP.png)
Inside each mask you can specify a colour selection/target and a colour to change it to/blend with.
.C2HKBfS0.png)
.C6pNyP0P.png)
You can adjust the selection with the hue, saturation and value tolerance sliders.
.vb7GNXUA.png)
And control the replacement method and strength with the Replacement Method and Mix Factor
.bepSivX-.png)
.BSkkkk5W.png)
Create Extra Attributes
For advanced users, greater control can be gained by manipulating the material directly within the shader editor – where named attributes can be used to control values.
Enabling Create Extra Attributes will create some extra, useful attributes inside the material's node tree.
.BTZrGI9W.png)
.CwvL-OlL.png)
Creating extra attributes can be costly performance-wise, so this is disabled by default.
We will cover these attributes more in the next section.
12. Shading – Material and Extra Attributes
Advanced users can manipulate the global KIRI_3DGS_Render_Material directly within the Shader Editor.
.d-4ofams.png)
Along with the shader node group – several other useful attributes and node groups are present.
The Alpha Edits group will let you modify the Alpha values for faces, for some very stylized looks.
.srT3mD-G.png)
.BRURx7fw.png)
If Create Extra Attributes is enabled in the Shader menu, a face area and a random-per-face attribute can be used.
.Dl5_5AlQ.png)
If the Animate modifier is enabled, isanimated and effectordistance attributes are available
.D_4G_he4.png)
If Animate modifier is enabled and the To Points preset is used, the Point Info node can be useful.
.BG8-DQGH.png)
13. Active Mode – Modify – Animate
.oJVQ8SJr.png)
This Animate modifier comes preloaded with presets and settings to quickly create stylised motion graphics renders using your 3DGS objects.
As updating faces is already a highly performance intensive task, it is extremely recommended that you:
- Use and apply as many modifiers as possible to reduce face counts.
- Work on an isolated object/separate part of your scan, rather than a full 3DGS scene.
- Use the Decimate Animated slider to reduce the number of faces affected by the animation
Animation effects can be Global (applied to the whole object), or by distance to a selected object or collection.
.BZztq6Ia.png)
If Effect By Object or Effect By Collection is chosen, a distance threshold will appear and anything below this will be animated.
.m_-BHG8y.png)
.wS-Imlqc.png)
There are 3 modes of animation, Displace Only, To Points and To Curves.
.Ds956iaG.png)
Each mode supports some of the following effects:
Noise Displacement – displaces faces based on the standard Blender Noise texture
.BK3WGAEQ.png)
This is available in all animation modes.
There are controls for the Noise Strength and Noise Scale.
The Time Evolution Multiplier will change the noise seed as the timeline is played. This is performance intensive so set to 0 as default.
Voronoi Displacement – displaces faces based on the Blender Voronoi Noise texture
.D64kpe1T.png)
This is available in all animation modes. The results are more chaotic looking than the standard Noise Displacement.
There are controls for the Noise Strength and Noise Scale.
The Time Evolution Multiplier will change the noise seed as the timeline is played. This is performance intensive so set to 0 as default.
Pixelate – points of each face are snapped to Blender's world grid, forming grid patterns
.CaOUx6KP.png)
This is available in all animation modes.
There are controls for the Pixelate Mix and Grid Scale.
To Points – animated faces will turn into points
This is available in the To Points animation mode.
Any animated faces will turn into points. all displacements/pixelate will contribute to point positions.
.DqtSxn2W.png)
To Curves – animated faces will turn into curves
.KBK4fFaS.png)
This is available in the To Curves animation mode.
Any animated faces will turn into curves. all displacements/pixelate will contribute to curve positions.
14. Active Mode – Render

Rendering 3DGS objects, with thousands of faces and many updating modifiers is a performance hungry task, so to make rendering a little faster and more reliable we have the Render menu.
This will automatically set all enabled 3DGS objects to use the Active Camera and will render all images offline (no Blender render window will appear, boosting performance).
Settings for the render will only appear with an Active Camera in the scene, otherwise a warning will show.

The render will use the current output settings, in the standard Blender Output Properties.
View transform settings are shown, as 3DGS object's colours are most accurately represented with a Standard view transform.
.B4eYeyyX.png)
The number of samples is available from the menu, as the default of 64 can produce very grainy results with the faces alpha transparency. Increasing this number can give smoother results.
.zKS9Iq7P.png)
The current output format is selectable as you must use an image format, not FFmpeg Video.
.BDOArkTO.png)
Selecting Render Offline (Image) will render a single image to the currently set output directory.
Selecting Render Offline (Animation) will render animation using the current timeline settings to the currently set output directory.
.AQDrpgY2.png)
Important note:
Because the rendering is performed 'offline', you must wait for the render to complete. If you want to cancel the render, you will need to 'force close' Blender.
It is therefore best to test render a few frames of an animation to check all settings before rendering a very long sequence.
15. Active Mode – HQ Mode
.BNW_kN3y.png)
Material transparency has two modes in Blender: dithered and blended.
In the addon and documentation we refer to dithered materials as LQ (low quality) and blended as HQ (high quality).
LQ mode can appear quite grainy and will sometimes give flickering artifacts in renders.
HQ mode is much smoother and should remove flickering artifacts. Due to Blender material limitations, LQ mode supports depth of field, but HQ does not.
Depth of field would need to be added using the compositor.
By default, the HQ Mode menu will show a warning if no camera is in the scene.
.BTnWUmdK.png)
HQ mode requires an active camera. After adding a camera, you will see more options.
.BjWjdKbT.png)
View transform settings are shown, as 3DGS object's colours are most accurately represented with a Standard view transform.
The number of samples is available from the menu, as the default of 64 can produce very grainy results with the faces alpha transparency. Increasing this number can give smoother results.
The current output format is selectable as you must use an image format, not FFmpeg Video.
Selecting Render Offline (Image) will render a single image to the currently set output directory.
Selecting Render Offline (Animation) will render animation using the current timeline settings to the currently set output directory.
Important note:
HQ mode is more performance intensive while working in the viewport. You should work in LQ Mode, and enable HQ Mode to preview final renders, or before rendering.
If you have a single 3DGS model, or multiple 3DGS objects that do not intersect each other, you can ignore the Objects Overlap? Button.
.CR_CbFx8.png)
If you have multiple 3DGS objects that intersect each other, you will need to enable the Objects Overlap? button.
.Cpo29Oue.png)
.DabtJoVj.png)
After enabling Objects Overlap? – a new button will be shown – Generate HQ Object, pressing this will do a few things:
.CK-Yc9LB.png)
Move all current 3DGS objects (we will consider them LQ objects) into a new collection named 3DGS_LQ_Objects (we will refer to these as LQ Objects).
These LQ objects will be hidden from view and render (while in HQ Mode).
A new object will be created, KIRI_HQ_Merged_Object (we will refer to this as HQ Object). and placed into a new collection, 3DGS_HQ_Object.
This new object is a merged instance of all objects in the 3DGS_HQ_Object collection.
While the HQ Object exists, toggling between LQ and HQ mode will toggle visibility and render for either all objects in the LQ collection, or the HQ object.
Important note:
If you have generated an HQ Object but want to continue editing/placing your LQ objects – switch to LQ mode, make your changes, then switch back to HQ mode.
Don't move LQ objects from the 3DGS_LQ_Objects collection while using an HQ object.
16. Active Mode – Omniview Object (Experimental)
If you are familiar with the concept of 'imposters' in video game, this is a similar approach.
The standard 3DGS objects have 1 face per 3DGS point and this face rotates to the current view.
An Omniview object has multiple faces per point, with each face permanently aligned to a specific axis.
.DQfJGoEi.png)
These objects do not need updating and can be 'instanced' – making some tasks (creating a forest of trees) much lighter in terms of performance.
You must first select a 3DGS object that has the 3DGS_Render modifier to generate the Omniview object from, otherwise a warning will be shown.
.DtnPEEWL.png)
Once selected, the menu will let you select how many axes the generated object should be aligned to.
The number corresponds to the number of faces per point. So, a 3DGS scan with 10, 000 points would become 30, 000 faces for a 3 Axes object.
.omDfK7s2.png)
You can then generate the object with Create Omniview Object – a new object will be created, offset from the original. The new object will have all modifiers removed.
.BEDVWZyF.png)
If an Omniview object is selected a new option will be shown in the Shader menu – the View Angle threshold
This is a value in degrees and will determine at how many degrees the current view can deviate from a face normal before the face disappears.
If the value is set to 1 – the face would only appear when looking directly at it.
If the value is set to 360 – the face will always be visible.
This can be useful for Omniview objects to 'blend' between different axis views. A value between 30 and 50 degrees is usually recommended.
Important note:
Omniview objects are an experimental feature – not a standard for Gaussian Splat rendering. It is recommended for both performance and visual quality that they are created only for isolated objects, not full 3DGS scenes.
17. Documentation / Tutorial Video
The Documentation button will launch a web browser, opening a page with the add-on's documentation
If you still need some extra help, the Tutorial Video button will launch a web browser, opening a page with a full extended tutorial video for the add-ons use.
18. See all Add-ons on Blender Market
If you are interested in using more of our add-ons, the See all Add-ons on Blender Market button will open a web browser for our addon marketplace.
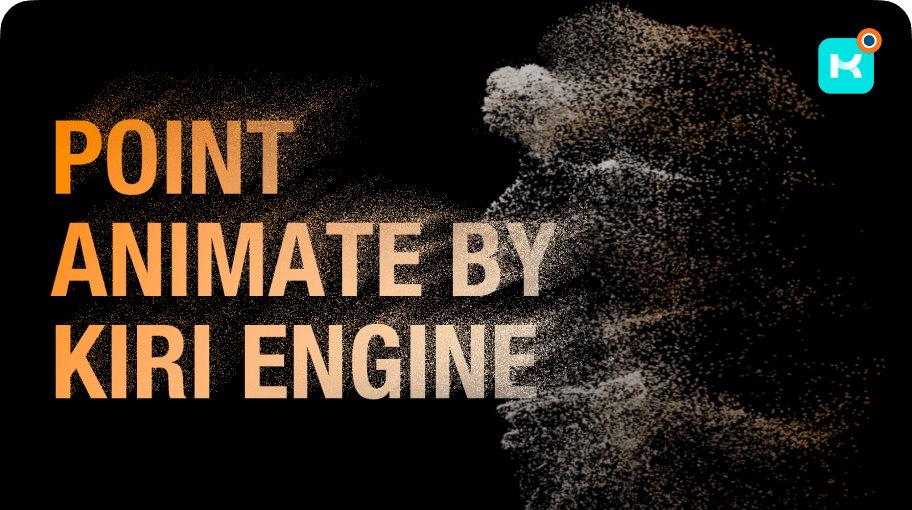
Point Animate by KIRI Engine
The addon simplifies the process of animating scans and models – Allowing for the creation of motion graphic renders in just a few minutes. Several animation presets are available and can be layered for complex effects.
Free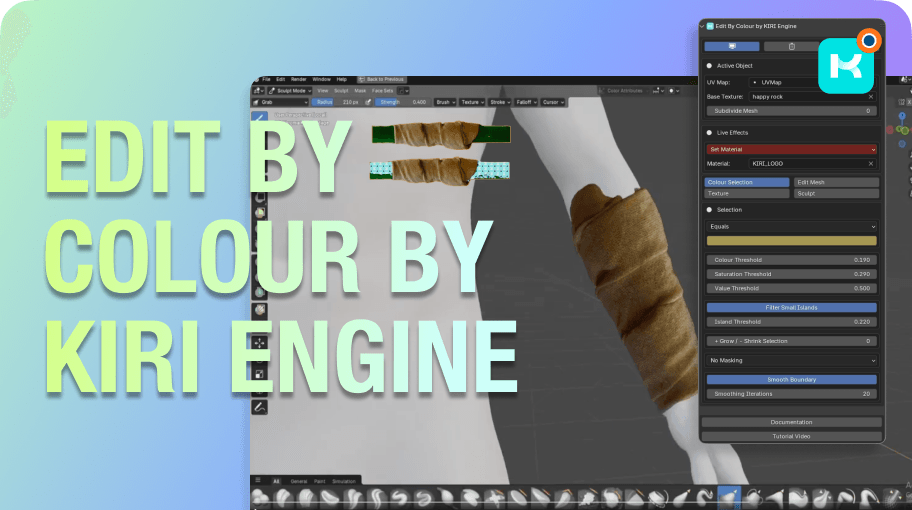
Edit By Colour by KIRI Engine
The Edit By Colour addon speeds up 3D scan editing in Blender with color-based mesh selection and manipulation, enabling faster baking, sculpting, retopology, and high-density mesh editing.
Free


