


Point Animate by KIRI Engine
The addon simplifies the process of animating scans and models – Allowing for the creation of motion graphic renders in just a few minutes. Several animation presets are available and can be layered for complex effects.
 Joe · Jan 21, 2025
Download Point Animate Addon:
 or
or
Please note: We are making these Blender addons available to you completely for free.:) If you like what we are doing, the best way to support us is to download KIRI Engine app on your phone and consider becoming a KIRI Engine Pro user
1. What does the addon do?
The addon allows you to animate scans or models by applying custom Geometry Nodes animation modifiers, enabling users to achieve VFX and motion graphic results without requiring any prior animation experience.
Designed for beginners, it lets you create animations with as few as five clicks.
For more experienced users, full control over each modifier is provided, with the option to layer them for more complex effects.
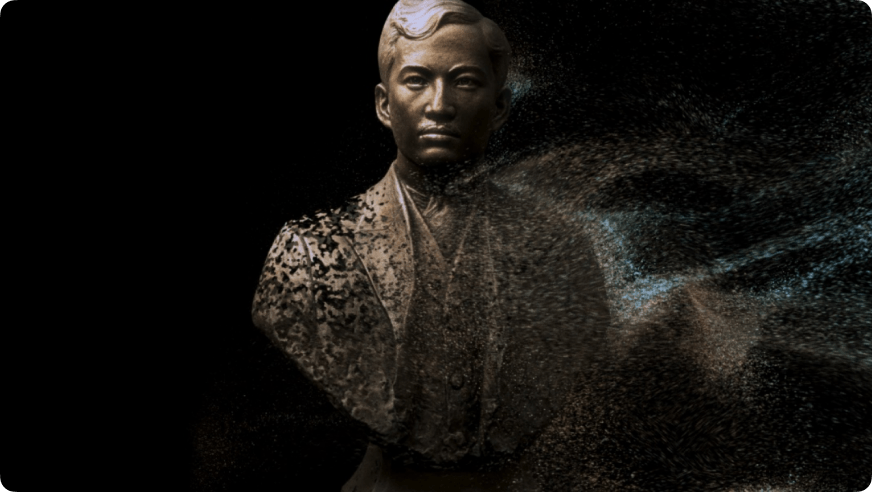
The addon is inspired by the point cloud animations of Ruben Fro and mv.nyc: with that in mind, presets are designed to convert solid meshes into point clouds. But for greater versatility, mesh objects can also be animated with ease.
2. Important Notes
Reading the full documentation is recommended. If you do not have time right now and want to get started immediately, you should at least check these points and the Quick Guide.
- Just like any other editing or animation operation in Blender – the number of faces/vertices a model has will greatly affect performance.
- Consider using the 'low poly' output from your KIRI scan exports before trying the high poly objects.
- Get into the habit of using the bake functions to boost performance.
3. Quick Guide
Full control is given for all animation presets – but for beginners, 4 Quick Presets are avallable. These are a good starting point, before adjusting controls manually
- Import an object. Your object can be a regular mesh (.OBJ / .FBX etc) or a point cloud (.PLY).
- Select your object and from the addon – choose a Quick Preset. I will choose Quick Dissolve
- A new window will open with settings for the chosen preset. For Quick Dissolve:
- Specify the Start Frame and End Frame for your animation to begin and end.
- Specify if your input = a point cloud or mesh. If you select Input = mesh (self) you can select the Mesh Colour Texture (used to colour the points).
- Hit okay.
- Play from the start of the timeline to preview the effects.
- The currently enabled animation modifiers will be highlighted.
- You can enable more layers or adjust the currently enabled.
- Adjust the animation to your liking using the manual controls found in Active Settings.
- When you are happy with your settings, click Bake for each animation layer. This will lock their settings but increase playback performance. To again adjust settings – hit the trash icon to delete the baked data.
.qJ4ltbcB.png)
.XuQZ0Uln.png)

4. Installation
Important note:
The addon was made with Blender 4.2 – the addon may function with earlier versions of Blender – but full usability cannot be guaranteed. It is best to use 4.2 and above.

To install the addon make sure you have downloaded the .ZIP file (point_animate_by_kiri_engine_version number).ZIP to your computer.
Drag and drop the .ZIP from a file browser into the Blender window.
An install dialogue will appear – press okay.
.pLWDuLIg.png)
The addon can now be found in the 3D viewport. Pressing the 'N' key will bring up the N panel where you can find the addon.
.DgzKiQku.png)
5. Add Modifiers / Quick Presets
Before any Point Animate modifiers are added to the active object, the addon interface will show 5 buttons for adding the required modifiers.
.B6uc_nfN.png)
Add Point Animate Modifiers will add all animation modifiers but leave their settings at default values and all modifiers disabled.
This is best for users who want to completely control their animation from the ground up.
The four Quick Presets – Quick Dissolve, Quick Magic, Quick Morph and Quick Tech will add the modifiers and enable some, with specific settings values.
This is great for beginners who are intimidated by huge settings lists.
After pressing a Quick Preset button, a window will be shown to specify the Start Frame and End Frame of the animation, and some preset specific settings.
.D-gOfHLt.png)
For some presets you need to specify the input / output type.
If your object is a point cloud – you should choose Input = Points, if your object is a mesh and you choose Input = Points, your mesh will be converted to points, and the animation will output only points.
If your object is a mesh, and you choose Input=mesh, you will be asked to select the Mesh Colour (diffuse) Texture to colour the points.

Hit okay, and the preset settings will be applied.
6. Interface Overview
Once an object has been given Point Animate modifiers. The full interface will be shown. The interface is split into 4 sections.
Add Effectors
It can be useful to add objects that do not render, to use as wind controllers or as mask objects. Here you can add a sphere, cube or arrow object that will not render by pressing any of the corresponding buttons.
.Cf5rwcI7.png)
Global Settings
The settings here will affect every modifier that is enabled – so these settings are always visible if your object has Point Animate modifiers. We will go into these settings further, later.
.YZidniN_.png)
Layer Stack
Here you can see which modifiers are currently enabled and you can enable/disable modifiers individually by pressing their corresponding buttons.
Be aware that Wind and Morph cannot be enabled together – hence their buttons sitting side by side. Enabling one will disable the other.
.Daan5gMa.png)
Active Settings
Because there are many settings for each modifier – showing them all at one time would make the interface huge. Here you can choose which modifier you want to show settings for. We will go into the settings for each modifier later.
.COa90nuw.png)
7. Global Settings
The settings here will affect every modifier that is enabled – so these settings are always visible if your object has Point Animate modifiers.
.BBgm15CB.png)
Rotation / Scale applied
A warning will show if the rotation or scale is not applied for the active object. Having unapplied rotation or scale can lead to unexpected animation behaviour. You can apply these with Ctrl+A, apply rotation and scale.
Mesh Colour Texture
If you input object is a mesh – you can specify its diffuse colour texture to colour its points. This option will not show if your object is a point cloud.
Point Material / Mesh Material
.CaXQNlme.png)
By default, your animated points are given the POINTANIMATE_MATERIAL, which comes loaded with useful attribute nodes. But you can specify any material you want.
If your input is a mesh and the Geometry Node, modifiers overwrite the meshes material – you can specify the mesh material here.
Start Frame / End Frame
.DkFOjVja.png)
Here you specify the period in which Point Animate modifiers are active.
Point Scale
The size of points is set here. Randomize will mix between the Min and Max point sizes. If Randomize is set to 0 – only the Minimum scale will be considered.
Depending on which modifiers are enabled, Attribute Influence may be shown to automatically change point scale – will cover this more in the Attribute Influence section.
.DFUr8U0D.png)
Viewport Display
This setting does NOT affect renders. It is for reducing the number of points in the viewport so that render previews are faster.
8. Attribute Influence
For beginners unfamiliar with Geometry Nodes or attributes, this may be the most confusing aspect of the addon. But it should quickly become clear, especially by playing with the addon's effects.
Any visible value in the addon – and the regular Blender UI – can be keyframed to control animation.
It can be a lot of work to keyframe many values individually, so you can use attributes to automatically control values such as point scale, shader values or a modifier's strength.
The attribute names are quite long and descriptive. So you can read what they do, rather than having to remember abbreviations.
Examples:
Timeline:0-1
This means that at the chosen Start Frame the value will be 0, and the chosen End Frame the value will be 1.
This could be used to make point scale grow over time.
The attribute can be visualised like this:

Timeline:20%-50%-80%=0-1-0
This value would stay at 0 until the timeline has passed 20%, then it would start to rise. It would peak with a value of 1 in the middle. Then return to 0 at 80% of the timeline.
The attribute can be visualised like this:
.B4sGtSTG.png)
Timeline:20%-50%-80%=1-0-1
This would be a reversed version of the previous example. This could make point sizes start at full size, shrink, then return to full size.
The attribute can be visualised like this:
.B9FX1XDI.png)
Isactive (if using Wind)
This attribute is only effective if the Wind modifier is used, and particles currently active in the simulation will have a value of 1.
Age (if using Wind)
This attribute is only effective if the Wind modifier is used. As particles join the simulation they will start to get older, with the value increasing each frame.
9. Baking

Any type of animation in Blender can be performance heavy, as each frame new information needs to be calculated.
If you are happy with a modifier's settings and effect, you can Bake its data so that the information no longer needs to be calculated.
This would give smoother playback for that specific modifier. However, changing settings would have no effect, until the Bake data is deleted.
If a modifier's data is baked, its settings will become greyed out and a warning will show:
Hitting Bake will bake the modifier's data. It will take a few seconds for the data to bake, and a progress bar will be shown on the Status Bar.
Hitting the trash icon will delete the data.
.BeDDMm3y.png)
Important note:
Due to Blender limitations – the addon may sometimes think your modifier has Baked data, when it does not. Pressing the trash icon will effectively refresh the bake status and fix this issue if it occurs.
10. Decimate
.CbeirnTq.png)
Decimate will remove a percentage of points from your object before animating anything. This is only necessary on incredibly large point clouds or when using lower end machines.
11. Crop Box
.DO9T-piN.png)
This allows you to specify a crop object or collection and a method of cropping.
Points Inside, Outside or by distance to the crop object/s can be removed.
Like Decimate, this removes points before any animation occurs, which can be useful for performance. However, the crop object and distance threshold values can be keyframed for interesting animation effects.
12. Wind
.CTApj70z.png)
This modifier will animate points, traveling in a certaln direction.
.DN07u6Ti.png)
Input
You first need to specify whether your Input=Points or Input=Mesh.
Mesh Face Scale
If you select mesh, you can set the Mesh Face Scale. The default uses the attribute Timeline:1-0making the mesh faces shrink over time.
Selection
The number of points that are animated is controlled with Selection. This can be controlled by an attribute, or by Selection Factor. Selection Factor is a percentage of the total number of points. This value can be keyframed for precise control.
.BygLzk6b.png)
Masking
The selection can be limited by a mask object or mask collection. Objects inside, outside or by distance to the mask object can be animated – like the Crop Box functions.
.5grE9d1j.png)
Wind Controller
The direction that particles travel is +z (upwards by default) but an object can be specified to control the direction. The arrow object from the Add Effector menu is perfect for this.
.C_a-lTp6.png)
Wind Strength
This will control the max distance each particle travels each frame.
Random Mix
This will control the percentage of particles that travel a fraction (Random Divider) of the Wind Strength value.
Random Divider
For particles affected by the Random Mix, this will affect what fraction of the top speed they travel at. A value of 2 would make these particles travel at half-speed.
13. Morph
.DTmHZamC.png)
Input/Output
Here you choose if you want an input point cloud to transform into another point cloud, or an input mesh to transform into a different mesh.
.BxVEBJnJ.png)
If you select points to points, you must specify whether the Target=mesh or Target=points.
If Target=points you must specify the object.
Linearize Colour
If your target point colours seem dull or washed out, try unchecking Linearize Colour.
If Target=mesh, you must choose the object, and the Mesh Colour Texture.
.B-Wp15xX.png)
14. Noise
Noise will displace point positions. It adds a further layer of complexity to Wind and Morph effects, making them more organic and dynamic looking.
.BYpqlyjg.png)
Input / Output
First you must select if your input=points or mesh. The settings for each choice are the same as the Wind and Noise modifiers.

Points Noise Type
You can select which type of noise pattern displaces your points. Regular noise, Voronoi, or a combination of the two.
Points Noise Strength
This controls the strength of the displacement effect. Attribute Influence can be used to multiply the chosen strength.
Points Noise Scale
This will control the size of the noise pattern. Attribute Influence can be used to multiply the chosen scale.
Points Noise Phase
This can make the noise pattern evolve over time. The phase value can be multiplied by Attribute Influence.
.7iDi1LtZ.png)
If you chose input=mesh, mesh settings will be shown.
Mesh Effects
This will let you choose if the mesh is displaced by noise, or if only the face scale changes.
If you select Scale and Displace mesh you will be shown settings identical to the Points noise settings – Noise Strength, Scale etc.
15. Snap To Shape
This modifier will force points to 'snap' to the position of a chosen grid of shapes.
.k7o5ukSa.png)
Preview Shapes
Enabling this will let you see the grid of shapes that your points are snapping to. You can enable this while adjusting grid and shape settings.
.ICD1Rs8Q.png)
Grid Movement
This will control if the grid is a fixed size that doesn't move = Grid is static , or if the Grid size adjusts to the overall simulation size = Grid morphs to bounds.
Grid Points
This controls the number of X, Y and Z points in the grid. Setting these all to 1 can produce a single shape for snapping.
Grid Translate / Rotate / Scale
This will let you control the location and scale and rotation of the grid. Keyframing these values can give very dynamic results.
Shape
This will let you choose the shape instanced on each point of the grid. If you select Custom Object, you can specify the instance object.
Shape Translate / Rotate / Scale
This is the same as the grid settings but changes each shape individually.
Selection
What percentage of points are affected by the modifier. Can be affected by Attribute Influence.
Masking
Affects which points are affected by the modifier. Exactly the same as the masking settings for the Wind modifier.
Effect Strength
The overall mix between a point's current position and the 'snapped' position.
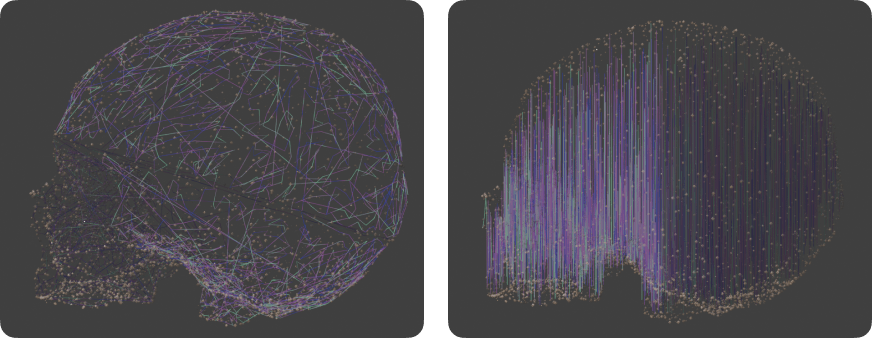
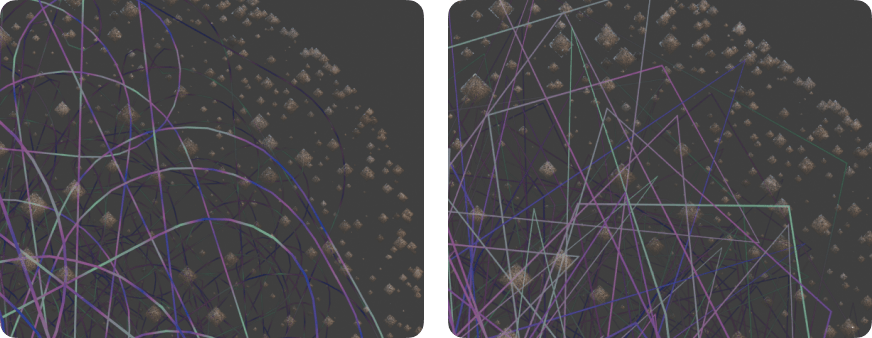
16. Wireframe
This modifier will connect points by wires, producing web-like or Plexus effects.
.BL8klIYX.png)
Single / Multiple
Whether the curves are composed of one single continuous curve, or many multiple curves, different settings will be available for each choice.
Point Order
Determines in which order points are connected – no weighting, from the centre, by axis or by distance to an object.
Selection
What percentage of points are connected by wires.
Masking
Affects the connected points selection. The same as the Wind and Snap To Shape masking settings.
Curve Resolution
The resolution of each curve. Increasing this can impact performance massively.
Curve Min / Max / Taper
The overall scale of each curve. Taper will make curves shrink from one end to another – but is barely noticeable when using a single curve. The scale can be affected by Attribute Influence.
.B6uGAYng.png)
Trim End
This will shrink the curves from one end to another – useful for curve 'growing' effects. This can be controlled by Attribute Influence.
Simplify
Only available when using a single curve. This will reduce the number of points in a curve.
Fillet
Only available when using a single curve. This will round the corners of a curve, giving a 'loopy' effect.
17. Shading
By default the animated objects will be given the POINTANIMATE_MATERIAL. This material comes pre-loaded with all the available attributes produced by the animation modifiers.
.DbESQlzt.png)
Using these attributes for shading is a topic for more advanced users and can't be fully discussed here.
However, for beginners, the material can be used as an example of what is possible when using attributes to control colour mixing or emission strength.
.BSE4mHq0.png)
.CO_G4WzE.png)
18. Documentation / Tutorial Video
The Documentation button will launch a web browser, opening a page with the add-on's documentation
If you still need some extra help, the Tutorial Video button will launch a web browser, opening a page with a full extended tutorial video for the add-on's use.
19. See all Add-ons on Blender Market
If you are interested in using more of our add-ons, the See all Add-ons on Blender Market button will open a web browser for our addon marketplace.

3DGS Render by KIRI Engine
The addon imports 3DGS scans and transforms them into mesh objects that can be edited, rendered and animated inside Blender. Several dedicated editing and animation modifiers are included to help improve performance and craft impressive renders.
Free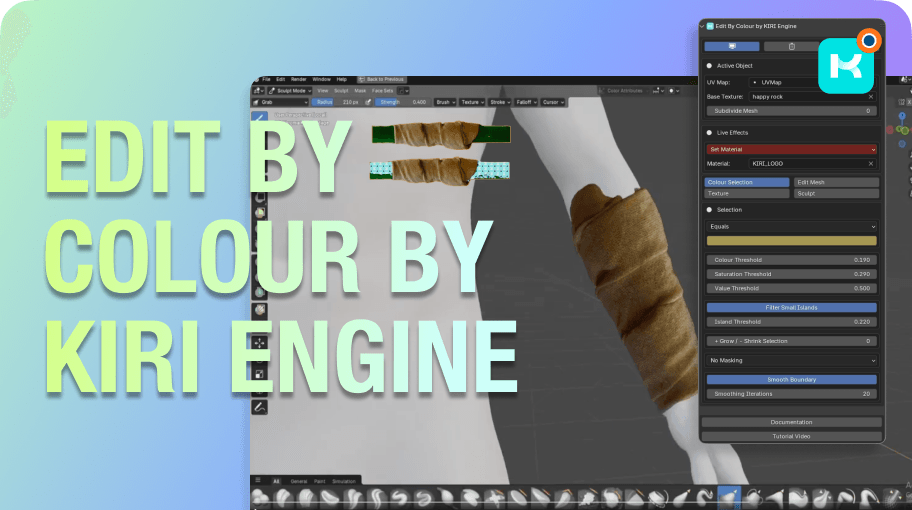
Edit By Colour by KIRI Engine
The Edit By Colour addon speeds up 3D scan editing in Blender with color-based mesh selection and manipulation, enabling faster baking, sculpting, retopology, and high-density mesh editing.
Free


